Sunday, July 17, 2011

Adventures in kumquats


It was love at first sight.

We stopped off at The Fruit Bowl fruit stand outside of Stockton, Calif. to buy a farmers market basket. Among the early-summer offerings, nestled beside the plums and nectarines and peaches and pluots (all of which my son is allergic to...) was a small display of something called "kumquats."

Of course I'd heard of kumquats before, but had never actually *seen* one. They're like tiny, cute little pygmy tangerines, maybe about the size of a large grape:


We walked away with a new farmers market basket full of kumquats.

But what to do with them? Certainly not eat them out of hand, as suggested by numerous internet sources. I tried one; just bit into it, skin and all, and it was much as you would expect a citrus fruit to taste like if you left the rind on.

I came across an intriguing recipe for cupcakes, but it called for minced, raw kumquats. I imagined that even the 20-22 minutes the batter would spend in a hot oven would not burn away the taste of raw kumquat, so I thought maybe the ubiquitous candied kumquat recipe that I kept stumbling upon would make a fine substitute.

Side note: So how much tinkering is required to make a recipe one's own? I made many adjustments to a kumquat-and-coconut cupcake recipe, maybe even enough to render it unrecognizable? Can I call it mine? Do I have to refer to my inspiration? No? Okay.

So here it is, possibly the most complicated cupcake recipe yet:

-----------------------------------------------------------------------------------

Kelly's Kandied Kumquat and Kokonut Kupcakes
Makes approx. 30 cupcakes

1 cup shredded, sweetened coconut, toasted
2 cups all-purpose flour
1 teaspoon baking powder
Pinch of salt
1 cup canned unsweetened coconut milk, stirred well
1/2 stick (4 tablespoons) unsalted butter, cut into 4 pieces
4 large eggs, preferably at room temperature
2 1/4 cups sugar
1/2 cup candied kumquats
1 tablespoon fresh orange juice
1 tablespoon fresh lemon juice
1 tablespoon orange zest (about one orange)
1 tablespoon lemon zest (about one lemon)
1 teaspoon pure vanilla extract

Preheat oven to 350 degrees. Line muffin tins with muffin liners.

Toast the coconut: Place in a dry skillet over medium heat, and gently stir until aromatic and golden brown, about 4 minutes. Remove from heat and set aside.

In a large bowl, sift the flour, baking powder, and salt together.

Pour the coconut milk into a small saucepan, add the butter, and heat until the milk is hot and the butter is melted. Remove from the heat, but keep warm.

Working with a hand mixer or stand mixer fitted with the whisk attachment, in a large bowl beat the eggs, sugar, candied kumquats, orange juice, lemon juice, orange zest, and lemon zest at medium-high speed until thick and almost doubled in volume, about 3 minutes. Beat in the vanilla. Reduce the mixer to low and add the dry ingredients.

Keeping the mixer on low, add 1 cup of toasted coconut, mixing until just blended, then slowly add the warm milk and butter. After thoroughly mixed, pour batter into muffin pans, filling each cup about 2/3 full.

Bake for 25 minutes, or until the cake is golden brown and a cake tester inserted into the center comes out clean. Transfer the pan to a rack and cool for 10 minutes before unmolding onto the rack to cool to room temperature.

Frost with lemon buttercream frosting, sprinkle with toasted coconut, garnish with candied kumquat.

Lemon Buttercream Frosting:
2/3 cup butter, softened
4 cups powdered sugar
1 teaspoon grated lemon peel
4 tablespoons lemon juice

In a bowl, beat butter until light and fluffy. Gradually add powdered sugar, beating well. Beat in grated lemon peel and enough lemon juice until desired spreading consistency.

-----------------------------------------------------------------------------------


Candy the kumquats! Just sugar, water and kumquats. Boil it all down. The resulting, chewy little gems are tasty and evocative of something from the Victorian era. (Mumsy! Mumsy! St. Niklaus left me a candied kumquat in my stocking! Wot wot, guv-nah?!??)


And pretty! After straining the kumquats out, the syrup left behind cools into a loose and runny jelly. Also quite tasty.


I added an extra layer of flavor by warming up some of the kumquat jelly and brushing it onto the tops of the still-hot cupcakes.


So not a terribly *hard* recipe. There are just a lot of little processes involved in making one cupcake: candying the kumquats, toasting the coconut, heating the coconut milk and butter, etc.


The verdict: labor-intensive. I would file this one under "Very Special Occasion Cupcake." I wound up making these for my mom's birthday Friday night, so I guess that qualifies. And I might also add, they taste very, very good. The essence of summer captcha'd in a cupcake.

Friday, July 1, 2011

I'm here, I'm here!!!


Back when I was in school, I was the dipstick who always waited until the last possible moment to do my term papers. I mail my bills the day they come due, crossing my fingers and naively believing that every institution has a "grace period." I fill my prescriptions the day after I run out. Well, are you getting the picture? I'm a procrastinator of the highest order. I've elevated it to an art form. I figure if I miss out on something because of my procrastination, it clearly wasn't worth having anyway.

So what does my late ass do? I go and join this online organization called TheDaringKitchen.com. Ordinary home cooks and bakers like you and me sign up and receive a monthly assignment to either bake (Daring Bakers) or cook (Daring Cooks) something. Everyone in their category is assigned the same thing at the same time. You bake or cook that month's assignment, you blog about it, take photos, etc., and share with the rest of the community.

Sounds like great fun!

Of course, my very first assignment -- baklava with homemade phyllo dough -- is already botched, because life got in the way a bit this month, what with a vacation, being sick, being lazy, whatever. I was supposed to finish it up by the last day of the month, and well, here I am. It's the first of the month and a new assignment will be posted very soon if it hasn't already.

Erica of Erica’s Edibles was our host for the Daring Baker’s June challenge. Erica challenged us to be truly DARING by making homemade phyllo dough and then to use that homemade dough to make Baklava.

As a show of good faith and intentions, I did half the project tonight, the last night of the month, albeit the easy half... I made the dough, the filling and the syrup (pictured above). Tomorrow night I'll finish up, rolling out the endless layers of phyllo, baking it and soaking it in syrup.

July will be different, i swear on my Braun immersive blender that I will never be late again! Ummm... There **is** a grace period, isn't there?!?!

Tuesday, June 28, 2011

Last of the lemons


I wanted to use up the last of the lemons last weekend, so I made what basically amounted to a cupcake version of the lemon berry cake from Father's Day.


I hollowed out the cakes a bit, using the open end of a large pastry tip, piped in a bit of lemon curd, replaced my divots, and topped with a lemony cream cheese frosting and a raspberry.


At least one person was happy with the results.

Tuesday, June 21, 2011

When your mother-in-law gives you lemons...


When I dropped the kids off at their grandma's for their annual summer stay, she wouldn't let me leave without a big bag of lemons from their lemon tree. What to do?

Anything lemon-y is worth doing super-lemony. So with Father's Day coming up, I jumped at the chance to make a lemon berry cake in his honor. Yes, yes, I know. He's diabetic. But he keeps his numbers low and is allowed to indulge every once in a while. Namely, when I get a wild hare up my ass to bake a cake.

The 1-2-3-4 Lemon Cake over at marthastewart.com fit the bill. Easygoing, but not overly so, as there are a few processes involved: making lemon curd, making cake, whipping up whipped cream. And shaving chocolate (yay!)

It's called a 1-2-3-4 cake because of the old-school recipe that calls for one cup butter, two cups sugar, three cups flour and four eggs. I love this cake; it's rustic and toothsome, not all pillowy soft like a cake from a box. It'll stand up to any number of toppings you want to throw at it.


----------------------------------------------------
1-2-3-4 Lemon Cake
www.marthastewart.com
Makes one 8-inch round layer cake

1 cup (2 sticks) unsalted butter, room temperature, plus more for pans
3 cups sifted all-purpose flour, plus more for pans
1 tablespoon baking powder
1 teaspoon baking soda
1/2 teaspoon salt
2 cups granulated sugar
4 large eggs, lightly beaten
1 1/4 cups buttermilk
1 1/2 teaspoons pure vanilla extract
Grated zest of 2 lemons
3 cups Lemon Curd (recipe below)
Sweetened Whipped Cream (recipe below)
12 ounces assorted fresh berries
Confectioners' sugar, for dusting

1. Heat oven to 350 degrees. Arrange two racks in center of oven. Butter two 8-by-2-inch round cake pans; line bottoms with parchment paper. Dust bottoms and sides of pans with flour; tap out any excess.

2. In a large bowl, sift together flour, baking powder, baking soda, and salt.

3. In the bowl of an electric mixer fitted with the paddle attachment, cream butter on medium speed until softened, 1 to 2 minutes. Gradually add granulated sugar, beating on medium speed until lightened, 3 to 4 minutes; scrape down sides once or twice. Drizzle in eggs, a little at a time, beating after each addition until batter is no longer slick, about 5 minutes; stop once or twice to scrape down sides.

4. On low speed, alternately add flour mixture and buttermilk, a little of each at a time, beginning and ending with flour mixture. Beat in vanilla and lemon zest.

5. Divide batter evenly between the prepared pans. Bake 25 minutes, then rotate the pans in the oven for even browning. Continue baking until a cake tester inserted into the center of each cake comes out clean, 10 to 20 minutes more. Transfer pans to wire racks to cool, 15 minutes. Turn out cakes; set on racks, tops up, until completely cool.

Lemon Curd
www.marthastewart.com
Makes 1 1/2 cups

NOTE: Make sure to double this recipe to make the three cups of curd that the cake recipe calls for!

3 large egg yolks, strained
Zest of 1/2 lemon
1/4 cup lemon juice
6 tablespoons sugar
4 tablespoons unsalted butter, cold, cut into pieces

1. Combine yolks, lemon zest, lemon juice, and sugar in a small saucepan. Whisk to combine. Set over medium heat, and stir constantly with a wooden spoon, making sure to stir sides and bottom of pan. Cook until mixture is thick enough to coat back of wooden spoon, 5 to 7 minutes.

2. Remove saucepan from heat. Add butter, one piece at a time, stirring with the wooden spoon until consistency is smooth.

3. Transfer mixture to a medium bowl. Lay a sheet of plastic wrap directly on the surface of the curd to avoid a skin from forming; wrap tightly. Let cool; refrigerate until firm and chilled, at least 1 hour.

Sweetened Whipped Cream
www.marthastewart.com
Makes 1 1/3 cups

2/3 cup heavy cream
1/2 teaspoon pure vanilla extract
2 tablespoons confectioners' sugar

1. Whip the heavy cream in the bowl of an electric mixer fitted with the whisk attachment on medium speed until soft peaks form, 2 to 4 minutes. Add the vanilla and confectioners' sugar; continue whipping on medium speed until the soft peaks return, 2 to 3 minutes. Use immediately.
----------------------------------------------------


I'd had enough of using the wrong tool. I have the wrong kind of lemon zester, which is all well and good if you want only want long, thin, curly ribbons of zest, which is almost never. So for this project, I finally caved and bought the right kind of lemon zester.


"Cook until mixture is thick enough to coat back of wooden spoon." That phrase makes sense after you make curd just once. When it has cooked long enough, it gets to a point where it coats the back of the spoon, instead of ... not coating the back of the spoon.


ZOMG. Nectar of the gods, I tell you. Double the recipe. Triple it. Quadruple it. Just make sure you have enough to pour yourself a generous mug of it to sip on when no one's looking.


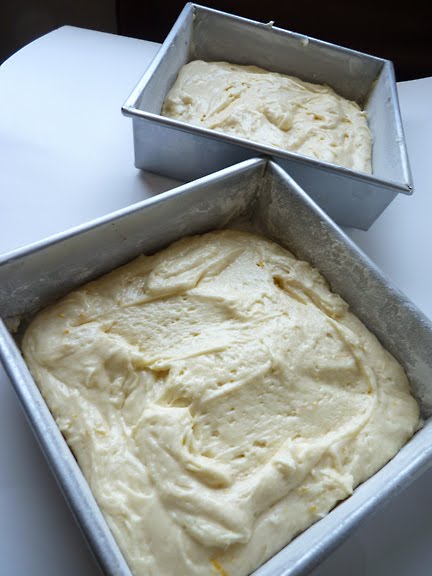
The recipe calls for 2"-inch deep round cake pans. The only 2"-inch deep cake pans I have are square. All my round ones are 1 inch deep.


So I skipped the dusting of confectioners sugar and opted instead for a mound of white chocolate shavings in the middle. Did I make the right call?

FINAL VERDICT: Lemon-y goodness is front and center in this one. A great way to put paid to a bushel of lemons foisted upon you by well-meaning in-laws. Would definitely make again. Thinking about a cupcake version, actually, cuz I still have a few lemons left. Stay tuned.

Saturday, June 4, 2011

Ebony and ivory live together in perfect harmony, side by side on my piano keyboard, oh Lord why don't we?


Heh. No time for a proper post at the moment. Just wanted to post a quick photo, cuz they're so purty: Cocoa macaron shells with banana-chocolate filling and plain ol' shells with Nutella filling. Cocoa shells have some over-pronounced feet, but supposedly that's the result of over-mixing, so note to self -- step off a bit when folding and fluffing.

I packaged these up in small cream-colored boxes with chocolatey brown ribbon, tucked in Target gift cards, and gave to the kids' teachers today as thank-you gifts. That's Klassy with a kapital K, folks.

Monday, May 30, 2011

Lazy Sunday: "We love these cookies like McAdams loves Gosling"


Another not-so-lazy Sunday. Got an early start because Nana didn't take the kids to church this morning (Snowing too hard? What? The last weekend in May?!?). So it was lunch at Subway, a blustery, slushy ride on the V&T at the railroad museum, storm chasing down 395 that eventually led to a double-rainbow sighting (OHMIGOD! WHAT DOES IT MEAN?!?!?!?) frozen yogurt (Mmmmmmmm) and that still got us home much too early. While I would've been more than happy to lay down and go to sleep at 4:30 p.m., the kids probably would've rebelled and burned something down.

So I broke out the S'more Cookie recipe. The key ingredients were hidden from kids and husband in a wadded up bag in the back of the pantry since Friday the 13th, when the recipe was Cookie of the Day over at Martha Stewart.

You can subscribe here, and Martha will send you a cookie recipe in your email every day of the year.


I love baking with the kids, but sometimes it can be trying. They are constantly working on sharing, and equal division of labor, to the point that if one kid gets to put in a teaspoon of baking powder, the other gets to put in a teaspoon of baking powder, or there will be hell to pay. If one gets to stir, the other has to stir for the exact length of time as the first. Argh. My kitchenette has become the last bastion of culinary communism.

But in-fighting aside, these cookies are super-easy to make. A couple of notes: I was about a quarter cup short of the brown sugar called for in the recipe. I made up the difference with turbinado sugar, which, while brownish in color, is nothing like regular brown sugar. The large crystals, though, added a deeee-lightful bit of crunch to the finished product. Also, the recipe calls for bittersweet or semisweet chocolate. I decided to go with Hershey bars, just to stay more in line with the S'mores ethos. And also because it was on sale last week at Raleys. But next time I make these, I will go with something more bittersweet, to stand up to the graham and marshmallow flavors. The milk chocolate flavor kind of got lost in this cookie.

----------------------------------------------------
S'mores Cookies
marthastewart.com

Ingredients

1/2 cup old-fashioned rolled oats
1 cup all-purpose flour, (spooned and leveled)
1 cup whole-wheat flour (spooned and leveled)
3/4 teaspoon ground cinnamon
1/2 teaspoon baking soda
1/2 teaspoon salt
1 cup (2 sticks) unsalted butter, room temperature
3/4 cup light-brown sugar
1 large egg
8 ounces bittersweet or semisweet chocolate, cut into 30 squares
15 large marshmallows, halved horizontally

Directions

1. Preheat oven to 350 degrees. In a food processor, pulse oats until finely ground. Add flours, cinnamon, baking soda, and salt; pulse to combine. In a large bowl, using an electric mixer, beat butter and sugar until light and fluffy. Beat in egg, scraping down side of bowl. With mixer on low, beat in flour mixture just until combined.

2. Drop dough by tablespoons, 1 inch apart, onto two baking sheets. Top each with a chocolate square. Bake just until lightly golden, 11 to 13 minutes, rotating sheets halfway through. Remove sheets from oven; heat broiler. Top each cookie with a marshmallow. One sheet at a time, broil until marshmallows are lightly browned, 1 to 1 1/2 minutes. Transfer cookies to wire racks to cool.
----------------------------------------------------


So yeah, I've always had problems with directions like "Drop dough by tablespoons." So I measure and cut, lest I wind up with 12 different-sized cookies on the same sheet.


Rolling, rolling, rolling...


Press the chocolate squares into the uncooked dough. It won't dribble out and run all over the place. In fact, the melted chocolate looks exactly the same as it does before it melts. Weird.


Tasty S'more goodness.

FINAL VERDICT: Easy, quick, fun project for kids and adults with all the classic flavors of campfire s'mores.

Monday, May 2, 2011

Sorry, Mike. I couldn't wait...


My friend and co-worker Mike, who has previously sent me into a macaron frenzy, now had me obsessing about rainbow cookies, also known as seven-layer cookies. He recently went to New York with his fiancee for a week and brought back bagels, rainbow cookies and a cold.

I'd never had one before, but they reminded me of something colorful and gooey that you'd find in the pastry case in a panaderia back home in California. Mike said he would bring me a recipe from a New York bakery, but I couldn't wait, and got on the Googles this weekend and found this Seven Layer Cookies recipe from Gourmet magazine.

No exotic ingredients, save an eight-ounce can of almond paste, which gives the cookie its moist structure and nutty taste. I have not seen a can of almond paste since I moved to Nevada. I decided to make my own, after yet another Google search, and because I have a Costco-sized bag of almonds that I hide in my closet. If I left them in the pantry, my husband Rob would snack on them all day and night, putting paid to a five-pound bag of almonds in less than a week.

This almond paste recipe at the Food Network site seemed the most do-able, and a fraction of the cost of a tube or a can or any other container of almond paste from the store.

----------------------------------------------------
Almond Paste
www.foodnetwork.com

I cup plus 3 tablespoons (250 grams) sugar
1/4 cup (75 grams) honey
1/3 cup plus 1 tablespoon plus 2 teaspoons (100 grams) water
3 cups plus 3 tablespoons (500 grams) blanched, whole, almonds
1/4 cup plus 1 tablespoons plus 1 teaspoon (50 grams) Kirsch or simple syrup, optional
Scant 1/4 cup (50 grams) butter

Place the sugar, honey and water in a saucepan and bring to a strong boil. Place the almonds in the food processor and grind until coarse. Remove the boiling sugar from the heat and pour over the coarse almonds. Blend until smooth. This may take 10 minutes or more, depending on the strength of the food processor. Remember, food processors are not usually strong enough to yield the same consistency as the almond paste that you can buy. If your mixture is too thick and the food processor is straining, you can add a little Kirsch or simple syrup to the processor. Add the liquid slowly and stop when the processor is moving more freely. The quality of almond paste is determined by how smooth the consistency is.

Wrap the almond paste in plastic wrap and allow it to cool. When you are ready to use it, knead in the butter. The butter makes it smooth and not so sticky.
----------------------------------------------------

Also, did not have Kirsch or simple syrup, and I'll be damned if I'm going to whip up a batch of simple syrup in addition to "whipping up a batch" of almond paste. So instead I thinned out the almond mixture using the bottom of a bottle of white creme de cacao, a chocolate bean-flavored liqueur. Still the mixture was too thick and my food processor overheated and stalled on me. Thankfully it got going again after chillin' out for a few minutes, but at that point I was out of creme de cacao. So I rummaged in my pantry for something else, and the most simple syrup-like liquid I could come up with was a Torani pumpkin spice syrup, that I wound up using just a smidge less than a quarter cup.

I don't know what an eight-ounce can of almond paste tastes like, but it can't be anywhere near as tasty as this concoction turned out to be. The above recipe yields way more than is needed for the cookie recipe, and I'll be saving the leftovers for future projects.

With that out of the way, I could start with the main recipe:

----------------------------------------------------
Seven Layer Cookies
www.gourmet.com

4 large eggs, separated
1 cup sugar
1 (8-oz) can almond paste
2 1/2 sticks (1 1/4 cups) unsalted butter, softened
1 teaspoon almond extract
2 cups all-purpose flour
1/2 teaspoon salt
25 drops red food coloring
25 drops green food coloring
1 (12-oz) jar apricot preserves, heated and strained
7 oz fine-quality bittersweet chocolate (not unsweetened), chopped

* Special equipment: a heavy-duty stand mixer; a small offset spatula

Put oven rack in middle position and preheat oven to 350°F. Butter a 13- by 9-inch baking pan and line bottom with wax paper, leaving a 2-inch overhang on 2 ends, then butter paper.

Beat whites in mixer fitted with whisk attachment at medium-high speed until they just hold stiff peaks. Add 1/4 cup sugar a little at a time, beating at high speed until whites hold stiff, slightly glossy peaks. Transfer to another bowl.

Switch to paddle attachment, then beat together almond paste and remaining 3/4 cup sugar until well blended, about 3 minutes. Add butter and beat until pale and fluffy, about 3 minutes. Add yolks and almond extract and beat until combined well, about 2 minutes. Reduce speed to low, then add flour and salt and mix until just combined.

Fold half of egg white mixture into almond mixture to lighten, then fold in remaining whites gently but thoroughly.

Divide batter among 3 bowls. Stir red food coloring into one and green food coloring into another, leaving the third batch plain. Set white batter aside. Chill green batter, covered. Pour red batter into prepared pan and spread evenly with offset spatula (layer will be about 1/4 inch thick).

Bake red layer 8 to 10 minutes, until just set. (It is important to undercook.)

Using paper overhang, transfer layer to a rack to cool, about 15 minutes. Clean pan, then line with wax paper and butter paper in same manner as above. Bake white layer in prepared pan until just set. As white layer bakes, bring green batter to room temperature. Transfer white layer to a rack. Prepare pan as above, then bake green layer in same manner as before. Transfer to a rack to cool.

When all layers are cool, invert green onto a wax-paper-lined large baking sheet. Discard paper from layer and spread with half of preserves. Invert white on top of green layer, discarding paper. Spread with remaining preserves. Invert red layer on top of white layer and discard wax paper.

Cover with plastic wrap and weight with a large baking pan. Chill at least 8 hours.

Remove weight and plastic wrap. Bring layers to room temperature. Melt chocolate in a double boiler or a metal bowl set over a saucepan of barely simmering water, stirring until smooth. Remove from heat. Keep chocolate over water.

Trim edges of assembled layers with a long serrated knife. Quickly spread half of chocolate in a thin layer on top of cake. Chill, uncovered, until chocolate is firm, about 15 minutes. Cover with another sheet of wax paper and place another baking sheet on top, then invert cake onto sheet and remove paper. Quickly spread with remaining chocolate. Chill until firm, about 30 minutes.

Cut lengthwise into 4 strips. Cut strips crosswise into 3/4-inch-wide cookies.
----------------------------------------------------


Finally an opportunity to use my new offset spatula! I never knew the joy of properly spreading things around until this moment. Never again will I use a butter knife to do an offset spatula's job.


Perfectly stiff, slightly glossy peaks make me squee with joy.


I used a measuring cup to make sure the dough is perfectly divided into three portions. I'm not very good at eyeballing that kind of thing.


The recipe calls for 25 drops of food coloring for each of the colored layers. I might go 3 or 4 more next time for a wee bit richer color. But still very pretty.


Another variation on the above recipe: I used apple jelly instead of apricot preserves, because my son Jakob is allergic to any fruit with with a pit (apricots, peaches, cherries, plums, etc). He's inconveniently weird that way.


After an overnight stint in the fridge, the layers had coalesced nicely.


There are some very helpful notes at smittenkitchen.com regarding her Seven Layer Cookies, most notably about freezing the uncut cookies before attempting to cut. I cut a few here, pre-frozen, to see if they tasted okay (they do!) and the rest is chilling in the freezer for cutting tomorrow.

FINAL VERDICT: This candy-like cookie is easier to make than they appear. The baking portion is minimal, the work likes in the construction. It's a fun and pretty one to add to your cookie repertoire. I look forward to trying out Mike's straight-from-the-bakery recipe.