Wednesday, April 27, 2011

'BOUCHE!!! There it is! 'BOUCHE!!! There it is!


One of the projects we made in 8th grade home ec class was cream puffs. The only other project I remember making in the cooking portion of our home ec class was apple pie. The apple pie I still make -- using a recipe pretty darned close to that first 8th-grade recipe, but the cream puffs... not so much.

The sewing portion of home ec is a whole 'nother story, involving a blouse that fell apart the first time I wore it and a little embroidered bird that fared a bit better, and the beginnings of an aversion to sewing altogether. Luckily for me, years later I would discover the joy (and frugality) of making my own fancy pillows and window treatments and shower curtains, and were it not for the demise of my sewing machine a few years ago, this might have been a blog about creating funky home fashions on a budget.

Back to the cream puffs. I didn't care for them. I still don't. I'm not a big fan of pate a choux dough-based pastries, which includes cream puffs, eclairs, crullers.

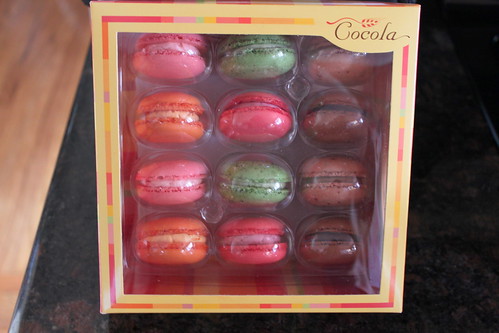
But my recent research and forays into spun sugar-land also brought up lots of info on croquembouche: cream puffs dipped in a caramel glaze, arranged into a tall, skinny pyramid and wrapped in an ethereal cloud of spun sugar. The challenge stuck in my craw, despite my dislike of cream puffs. I mean... dipped in caramel? Anything tastes better dipped in caramel.

Easter dinner at the folks' was coming up, and I volunteered to make dessert, so I wanted to make something more original than carrot cake (which I do love, btw). I know croquembouches are more associated with Christmas than any other holiday, but what the hell, right?

My favorite cookbook in all the world is Sherry Yard's "Secrets of Baking":


The awe-inspiring recipes herein and the helpful and vast know-how that Yard imparts will one day spawn my year-long "Julia and Julia"-type adventure, where I bake every single recipe in the book, in order, much to my family's chagrin.

Yard's croquembouche recipe breaks down the project into three smaller, more manageable projects, each of which I tackled on three different days. First up, the pate a choux:

------------------------------------------------
Pate a Choux 
(from "The Secrets of Baking" by Sherry Yard)

1 cup bread flour
1 tsp sugar
1/4 tsp salt
1/2 cup water
1/2 cup whole milk
6 tbsp butter
4-5 large eggs

For the egg wash:
1 egg plus 1 yolk

Sift together the flour, sugar, and salt in a large bowl. Set aside.

Bring the water, milk, and butter to a boil in a large saucepan over medium heat. Once it boils, remove the pan from the heat and add the flour mixture all at once.  Using a wooden spoon, stir vigorously to combine.

Return the mixture to medium heat and stir constantly in figure eights. Cook for at least 4 minutes, or until the mixture has a smooth, mashed-potato-like appearance. This helps to break down the starch and develop the gluten. Remove from heat.

Transfer the hot mixture to the bowl of a standing mixer fitted with a paddle attachment or use a hand mixer. Mix on low for 1 to 2 minutes. Add 4 eggs, one at a time. Be sure to let the batter absorb each egg and scrape down the sides of the bowl with a rubber spatula before adding the next. Before adding the last egg, test for consistency. Pinch off about 1 tsp of the dough with your thumb and index finger, then pull your fingers apart.  The dough should stretch rather than break. If it breaks, add the last egg.  Mix on low speed until thoroughly incorporated, about 2 minutes.  Do the finger test for consistency again. The dough should be shiny and smooth.

For cream puffs: Fit a large plain tip into a large piping bag. Make a big cuff at the top of the bag and fill the bag halfway with choux paste. Uncuff and twist the top of the bag to push the contents toward the tip. Pipe mounds 1 1/2 inches in diameter and 1 inch high.  

Preheat the oven to 425 F. Adjust the rack to the center of the oven and place a heatproof baking dish or pan on the floor of the oven.

Line a baking sheet with a Silpat.

Make the egg wash by whisking the egg and yolk in a small bowl. Brush lightly but evenly over the piped dough.

Place the baking sheet in the oven and pour hot water into the baking dish on the oven floor. Quickly close the door to keep all the steam in the oven. Bake for 10 minutes, or until the puffs begin to rise, then turn the heat down to 350 F and rotate the baking sheet. Prop the oven door open slightly with a wooden spoon and bake for about 15 more minutes, until the pastries turn nutty brown.

Remove from the oven and cool completely on a rack.
------------------------------------------------

So I did this all the first night, two days before Easter, and packed them carefully in freezer bags and set them in the freezer. Easy and pretty, and the one puff that offered itself up for a taste test reminded me that yes, indeed, pate a choux is not my favorite. Still that bland, slightly leathery vehicle for gooey pastry cream delivery.


Next up: pastry cream. This part wasn't quite as easy or as pretty as the puffs. For one, Yard's book, as excellent as it is, contains a grievous error at a critical point, and B) I not only stumbled at that critical point, but also at enough critical points along the way that I wound up with the dreaded "grainy pastry cream."

------------------------------------------------
Chocolate Pastry Cream
(from "The Secrets of Baking" by Sherry Yard)
yield: 2 to 2 1/4 cups

2 cups milk
1/2 cup sugar
1 1/2 t finely chopped orange zest (I forewent the zest for this variation)
2 t vanilla extract
3 T all-purpose flour or cornstarch
pinch of salt
5 large egg yolks or 3 large eggs, chilled
1 T unsalted butter, softened
4 oz. bittersweet chocolate

If you will need to cool this quickly, line a baking sheet with plastic film and set aside.

Bring the milk, 1/4 cup sugar, and vanilla to a simmer in a medium nonreactive saucepan over medium heat

Meanwhile, sift together the remaining 1/4 cup sugar, the flour or cornstarch, and salt onto a piece orf parchment paper. Whisk the egg yolks or eggs in a large bowl. Add the sifted dry ingredients and whisk until fluffy.

When the milk comes to a simmer, remove from the heat and ladle out 1/2 cup of the hot milk mixture. Drizzle it slowly into the eggs while whisking. Once the 1/2 cup milk is incorporated into the eggs, pour the mixture back into the hot milk, whisking constantly. Be sure to scrape all the eggs into the pan with a rubber spatula.

Immediately begin to rapidly whisk the pastry cream. In less than 1 minute, it will boil and begin to thicken. Continue to whisk for about 3 minutes, or until it has the consistency of pudding. To test the cream for doneness, tilt the saucepan to one side. The cream should pull away from the pan completely. Rinse and dry the large bowl.

Strain the pastry cream through a fine-mesh strainer back into the bowl. Add the butter and chocolate and stir until it is metled and incorporated. If the cream seems grainy, pulse it in a food processor until smooth. The cream is now ready to use, or it can be cooled to room temperature and refrigerated for up to 3 days. To cool the pastry cream quickly, spread it out on a baking sheet lined with plastic film. To prevent a skin from forming as it cools, place a sheet of plastic film directly on the surface.
------------------------------------------------

In the next-to-last graf, and the graf before that, the recipe instructs you to remove the pan from the heat. In no way, shape or form does it tell you to at any point return the pan to the heat. So I'm standing there whisking like a madwoman while my cream gets cooler and cooler and not thicker and thicker. It finally twigs that I should try maybe returning the pan to the burner, and that further cooking is required.

So yes, I'm hoping that it's Chef Sherry's fault that I am a lousy pastry cream maker. It was grainy, and while the taste was ... okay... it would've tasted better if it was actually creamy and grain-free. Any number of instant Jell-O puddings would've tasted better than what I ended up with. Anyway, I covered it with plastic wrap and popped it in the fridge.

The next day was Easter Sunday. After the egg hunt at my parents' house, and while my mom finished making our late lunch/early dinner, I ran home and finished up the dessert.

First I got the puffs out of the freezer and started defrosting those, while I filled a pastry bag with the pastry cream. With a sharp knife, I made a small X in the bottom of the puffs, then impregnated it with chocolate goo:


I ran out of pastry cream before I ran out of puffs, so note to self: plan on a smaller 'bouche next time, or make more pastry cream. This batch was enough to fill about 25 puffs.

I heated up a batch of Yard's master caramel recipe, and started dipping. The resulting sticky puffs were unwieldy and almost impossible to wrangle into a tree shape. Next time I will fashion some kind of cone for a base to help shape it up. As it was, I wound up with basically a pile of puffs on a plate.


Still kinda pretty, but not a classic croquembouche.

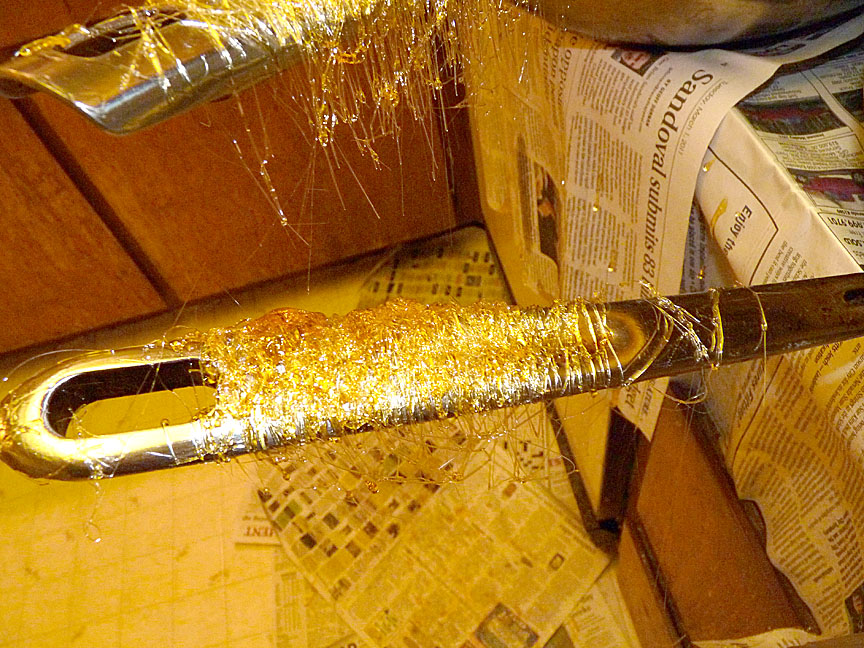
I ran into the same problem with the spun sugar that I did when I made the spun sugar tumbleweeds for my dad's cupcakes.

I was supposed to use the last of the dipping caramel to shake out a froth of spun sugar atop my 'bouche. But since I had to stop and reheat it a couple of times while I dipped the puffs in it, it managed to further cook to a more brittle consistency. So if there is a next time, I will probably make two separate batches of caramel, the second batch made especially for spun sugar.


So while the spun sugar clumped and dripped a bit, I still managed to get some on the 'bouche. Of course the first thing my son says when I unveil it back over at my mom's house is, "Looks like it's covered in dog hair!"

Lovely.


But everyone seemed to like it, although no one really seemed to know what to think of it, having never, ever seen one or heard of one previously.

VERDICT:

1) A lot of work, but manageable when broken down into several tasks performed over two or three days.

2) Find a better, more fool-proof pastry cream recipe, and then make more of it than the croquembouche recipe calls for.

3) I can't trust my construction skills on this one. Especially when there is hot caramel involved. So I might have to use a form of some kind to make my 'bouche a bit more tree-like

3) More practice with spun sugar.

Sunday, April 17, 2011

Which came first, the ramekin or the recipe


When you have unhealthy relationships with both food and money, what does a gal do after work on a payday? Go on a ramekin shopping spree.

I bought ten ramekins last night of varying sizes, for no other reason than the fact that I have no ramekins.

--------------------------------------------------
NOUN: ramekin (plural ramekins) (cooking) a small glass or earthenware dish, often white and circular, in which food is baked and served

c. 1706, from French ramequin, either from dialectical Middle Dutch rammeken (“a cheese dish”) or from Middle Low German ramken (“cream (diminutive)”) diminutive of ram (“cream”), from rōme, akin to Old English ream (unrelated to Modern English cream), German rahm.
--------------------------------------------------

Well, I guess that's not entirely true. I found a recipe for a lava-type cake in a recent Something Extra magazine, and it called for baking them in four-ounce ramekins. And it stuck in my craw that I had no ramekins, or even an acceptable substitute.

I got the above 4- and 6-oz ramekins at Cost Plus, plus the two flat-looking 4-oz tart/ramekin thingies on the right at Le Dollar Store, next door to Cost Plus.

So come Saturday, my husband Rob and I had, in what's known in healthy eating circles as "A Bad Day." Mostly courtesy of a $50 Red Lobster gift card that surfaced last weekend when I cleaned the home office. It had gone missing four years ago, and had reached a Holy Grail-like mythological status in our household. Cleaning out a closet? "Well, maybe you'll finally find that Red Lobster card! Har-de-har-har-har!" Donating some clothes? "Better check those pockets, make sure you don't donate that Red Lobster card..." We actually hadn't eaten at Red Lobster except maybe once or so in the intervening years, cuz it's just too painful to sit there and eat something that could've been FREE, damn it.

So we remedied that today by eating $50-and-then-some worth of various shellfishes with drawn butter and a buttload of Cheddar Bay Biscuits. Which I will have to try and re-create one of these days. But that is neither here nor there, when it comes to ramekins. Or is it?

When the waiter finally got to the part of the meal where he says, "Did you save room for dessert?" I gave Rob the stink-eye and told him that I would make us something for afters when we got home. Cue vision of ramekins dancing in my head.

So our "Bad Day" ended with little Molten Spiced Chocolate Cabernet Cakes, which I had bookmarked in a recent Sunset Magazine. The recipe calls for Cabernet (of course), which I didn't have, so I substituted my go-to liqueur, Bailey's, which I also swirled onto the plate with the cake. Only thing I would do differently next time is butter the ramekins with a heavier hand. They resisted popping out properly, but ZOMG. So tasty.

--------------------------------------------------


Molten Spiced Chocolate Cabernet (or Bailey's) Cakes

4 ounces semi-sweet baking chocolate
1/2 cup (1 stick) butter
1 tablespoon Cabernet Sauvignon or other red wine (or BAILEYS, BAILEYS, BAILEYS!!!)
1 teaspoon McCormick Pure Vanilla Extract
1 cup confectioners' sugar
2 eggs
1 egg yolk
6 tablespoons flour
1/4 teaspoon McCormick Gourmet Collection Cinnamon, Saigon or 1/4 teaspoon McCormick® Gourmet Collection Roasted Saigon Cinnamon
1/4 teaspoon McCormick Gourmet Collection Ginger, Ground
1/8 teaspoon McCormick Gourmet Collection Cloves, Ground (optional)
Directions

1. Preheat oven to 425°F. Butter 4 (6-ounce) custard cups or soufflé dishes. Place on baking sheet.

2. Microwave chocolate and butter in large microwavable bowl on HIGH 1 minute or until butter is melted. Stir with wire whisk until chocolate is completely melted. Stir in wine (or BAILEYS, BAILEYS, BAILEYS!!!), vanilla and confectioners' sugar until well blended. Stir in eggs and yolk. Stir in flour, cinnamon, ginger and cloves. Pour batter evenly into prepared custard cups.

3. Bake 13 to 15 minutes or until sides are firm but centers are soft. Let stand 1 minute. Carefully loosen edges with small knife. Invert cakes onto serving plates. Sprinkle with additional confectioners' sugar. Serve immediately.
--------------------------------------------------

Next up for my new little army of ramekins is some sort of little, individual chicken pot pies with phyllo on top. Stay tuned.

Monday, April 11, 2011

Le Petit Obsession, Part Deux


More macarons tonight. In color! This is the same Wilton Sky Blue that I used for my son Jakob's birthday bowling party cake.

My go-to recipe so far is the one from Macarons: Authentic French Cookie Recipes from the Macaron Cafe by Cecile Cannone.

These should be easy, right? I mean, it's really pretty basic. It's a meringue plus some other stuff. There shouldn't be any mystery and magic and heartache associated with these maddening little, tarted-up meringue cookies. You make a meringue once and you should then be able to do it in your sleep, yeah? Pffft.

-------------------------------------------------------------
French Meringue Macarons
Makes 50 to 60 shells, for 25 to 30 filled macarons

• 2¾ cups (8.8 ounces/250 grams) almond flour
• 2¾ cups (12.4 ounces/350 grams) powdered sugar
• 1 cup egg whites (from 7 or 8 eggs), at room temperature
• pinch of salt
• 2 teaspoons powdered egg whites, if weather is humid
• ¾ cup (5.3 ounces/150 grams) superfine granulated sugar
• 5 to 7 drops gel paste food coloring (optional)

Step 1: Line your baking sheets with parchment paper.

Step 2:
Blend the almond flour with the powdered sugar in the food processor to make a fine powder (or sift together, discarding any large crumbs and adding a bit more almond flour and powdered sugar as needed to compensate). Then sift the mixture through a strainer until it's as fine as you can get it. This keeps crumbs from forming on the macaron tops as they bake.

Step 3: With the wire whip attachment on the electric mixer, beat the egg whites with the salt and the powdered egg whites (if you're using them), starting slowly and then increasing speed as the whites start to rise. Add the granulated sugar and the food coloring. Beat until the egg whites form stiff peaks and your meringue is firm and shiny.

Step 4: Pour the beaten egg whites onto your almond flour mixture and gently fold them in, using a rubber spatula. Move your spatula from the bottom of the bowl to the edges with one hand, using your other hand to rotate the bowl. Now hit the spatula against the rim of the bowl until the batter falls in a wide ribbon when you raise the spatula. When you can't see any crumbs of almond flour and the mixture is shiny and flowing, you're ready to start piping.

The French have a special word-macaronner-to describe the physical action of mixing all the ingredients for macarons. This has to be done by hand. You cannot do it with your mixer-you must be able to feel the consistency of the macaron batter.

Step 5: Fit your pastry bag with a number-8 tip and fill with batter. Start by squeezing out a small amount of mix onto a parchment-lined baking sheet to form a 2½-inch circle. Be sure to leave 1 inch of space between macarons so they will not touch each other while they bake.

If the peak that forms on the top of the macaron does not disappear after piping, it means the batter could have been beaten a little more. To eliminate the peaks, tap the baking sheet on the tabletop, making sure to hold the parchment paper in place with your thumbs.

Let the piped macarons rest for 15 minutes. Preheat the oven to 300°F (325°F for a non-convection oven).

Using a pastry bag requires some practice. It may seem awkward at first, but you'll soon get the hang of it.

Prepare the bag (if it hasn't been used before) by cutting about 2 inches off the narrow end-just enough so that when you insert a number-8 decorating tip, about a third of the tip extends outside the bag. Push the tip firmly in place and spoon in your filling, leaving enough room at the top to twist the bag shut. It's best to fill the bag with half of the batter at a time so it's not too heavy. To make it easier to fill your pastry bag, place it upright in an empty jar or other straight-sided container. This will help steady the bag while you fill it with batter. Squeezing the bag slowly, pipe each macaron shell out in a single dollop. Lift the bag quickly to finish.

Step 6: Bake for 14 minutes. After the first 5 minutes, open the oven door briefly to let the steam out.

Let the macarons cool completely on a rack before taking them off the parchment paper. Press the bottom of a cooled baked macaron shell with your finger; it should be soft. If the bottom of the shell is hard, reduce the baking time for the rest of your macarons from 14 minutes to 13 minutes.
-------------------------------------------------------------

My poor little oven's obviously different from Cecile's and I'm doing some mad adjusting. Here are the notes that I jotted down from Round Three tonight:

Macaron Notes: 10 April, 2011

Couple drops sky blue gel coloring to make light blue shells. Piped into 1.5 inch rounds. Rested 30 minutes after piping.

First batch: 13 minutes, 325 degrees, 2 pans = too brown (below, left)


Second batch: 12 minutes, 300 degrees, 2 pans = not done enough, back in the oven for 90 seconds

Third batch: 14 minutes, 300 degrees, 2 pans = bottom pan/just right, top pan/back in the oven 90 seconds

Conclusion: one pan at a time using specs from third batch

I'm still concentrating on shells and am not splurging time nor ingredients yet on fillings. I bought a fancy jar of raspberry preserves earlier this week, and slathered a bit on a couple of shells and it was quite tasty. But it was messy and of a consistency that would probably only work if I were going to build the macarons and serve them right away. So instead I whipped together a quick half-batch of Hershey's "Perfectly Chocolate Chocolate Frosting."

-------------------------------------------------------------
"Perfectly Chocolate Chocolate Frosting
About 2 cups frosting

• 1/2 cup (1 stick) butter or margarine
• 2/3 cup HERSHEY'S Cocoa
• 3 cups powdered sugar
• 1/3 cup milk
• 1 teaspoon vanilla extract

Melt butter. Stir in cocoa. Alternately add powdered sugar and milk, beating to spreading consistency. Add small amount additional milk, if needed. Stir in vanilla.
-------------------------------------------------------------

Slightly browned ones as well as the acceptable ones are covered in foil and maturing in the fridge.

In other news:


We have baby tomatoes! These are the Yellow Canary, plus the Silver Fir Tree seems to have popped it's head up sometime between the kids' bedtime at 9 p.m. and now. The Snap Peas were the first to come up earlier this week. They are a bit ambitious. I should have started them later than the rest.

Well, 4:20 a.m. seems as good a time as any to end a post, so I bid you adieu. Keep on, macaron.

Sunday, April 3, 2011

Le Petit Obsession, Part Un


Macarons have slowly been building in the foodie zeitgeist for about a year now, and are on the verge of exploding like that whole cupcake thing a while ago. I mean, ask me a year ago -- hell, six months ago -- what a macaron or macaroon is, I would've kvetched about those gigantic Costco coconut and sugar bombs dipped in chocolate that weigh about a pound apiece. I had never even tried a macaron until I made my first batch a couple of weeks ago.

Actually, macarons, the real-deal French ones, have been spotted at Costco recently:


That's all she wrote, folks. All that's left is a Food Network reality show about rival macaron shops, complete with feisty, chirpy macaron chefs and their equally feisty, chirpy macaron crews.

---------------------------------------------------------------------
Anyways. From Wikipedia:

A macaron is a sweet confectionery made with egg whites, icing sugar, granulated sugar, almond powder or ground almond, and food coloring. The macaron is commonly filled with buttercream or jam filling sandwiched between two cookies. Its name is derived from an Italian word "maccarone" or "maccherone". This word is itself derived from ammaccare, meaning crush or beat, used here in reference to the almond paste which is the principal ingredient. It is meringue-based: made from a mixture of egg whites, almond flour, and both granulated and confectionery sugar.

The confectionery is characterized by its smooth, domed top, ruffled circumference (referred to as the "foot"), and a flat base. It is mildly moist and easily melts in the mouth.
---------------------------------------------------------------------

My interest in macarons coincides with a recently engaged friend's interest in perhaps including macarons at his wedding reception. I had just ordered this book only a day or two before we happened to start talking macarons:


Soooo... I want that gig! I want to make macarons for a wedding!

But I can't do it until I become a macaron expert.

So far I have made a grand total of two batches of macarons; the first batch was unrecognizable as macarons. They were still tasty, but a complete and utter abomination:


This was before I ordered a food scale and before my macaron book came in. I used the marthastewart.com recipe that was well-reviewed on the site, so I was hopeful. Blurgh.

The second batch was way more successful. I had a food scale, I had an authentic recipe from the "Macaron" book. I wasn't going to let these little buggers get the best of me.


Well hellooooo, macaron. I think these are pretty textbook: smooth, domed tops, a frilly little foot and a flat bottom.


This particular batch is filled with a banana-chocolate spread that I got at World Market. (I'm just now getting used to calling that store "World Market." To me it will always be COST PLUS. Is that just a California thing?) Basically I'm just working on macaron shells at this point, and will move on to creative, homemade fillings a bit later. Also, colored shells. Next batch will feature some color.


I think we're moving in on acceptable macarons, folks. But I'd never had a store-bought one before, so I don't know how these stack up. I liked 'em, though. They seemed to get a good reception from the folks at work. They stored beautifully in the fridge. Well, for two days, at least. I guess that's a good sign that they were all gone after two days. Bringing them back to room temp after removing them from the fridge cuts down on the almost-a-tad-too-chewy factor.

Notes for next time: The "Macarons" book calls for 2.5-inch shells, which seems enormous to me. I might scale back a little, and bake them for a minute or two less.

Ever onwards.

Far from skid row, I dream we'll go somewhere that's green


Last night I finally started seeds. Yay me. If I didn't do it, like, TODAY, I'd seriously be pushing that whole "last frost date" thing, and then I'd never get around to it, just like last year and the year before that. I used last year's seeds that I had ordered but had never even taken out of the envelope; hopefully they are still viable.

I ordered these particular batches of seeds from containerseeds.com and seedman.com (I just now googled containerseeds.com, and it seems they are no longer in business).

I've got:

• Baby Eggplant
• Hanging Basket Cucumber
• Japanese Bunching Onion
• Miniature Red Bell Pepper
• Miniature Yellow Bell Pepper
• Miniature Chocolate Bell Pepper
• Silvery Fir Tree Tomato
• Siberian Tomato
• Red Robin Tomato
• Yellow Canary Tomato
• Sugar Ann Snap Peas
• Wonderberry

They are all smallish plants, and most were picked specifically to grow in containers out in the back yard, as we have pretty poor soil in these parts, and I am just not up to digging up and amending the soil of an entire garden-sized plot. Not that I haven't tried before.


I started with a homemade seed-starting mix: 1 part perlite, 1 part vermiculite and 2 parts sphagnum moss. All three are available separately at home centers. There are pre-mixed seed starters available, but they are pretty heavy on the moss and light on everything else, which makes it pretty dense and difficult to drain.


I punched holes in the bottoms of 18 plastic cups and filled them with the starter mix. Keeping them in aluminum roasting trays makes it easy to water them from the bottom. I like to use clear cups because it's fun to be able to watch the roots grow once they get started.


Got my seeds and labels and am ready to go. Most of these seeds are super tiny, and don't need to be buried more than a quarter inch deep, so I poke a hole in the mix with a pencil, about halfway up the exposed wooden point, and use tweezers to drop the seed in.


Everything gets labeled.

Today I'll dig around in the garage and find the grow light, which is basically just a shop light with flourescent bulbs. I'm setting these guys in the office for now, because a) it's just too cold still out in the garage and b) I don't want to have to clear off the workbench out there yet. That'll be an all-day task. I'll have to buy a new timer for the light, though, as my son Jakob at one point over the years found it funny to pull the little red stopper pins out of the timer and do God-knows-what with them. So I am stuck with a timer that never stops. Once the seeds sprout, they will need 14-16 hours of light a day, and a timer is the best way to just set-it-and-forget-it.

Hopefully, all this effort means fresh, homemade salsa later this summer.

Friday, April 1, 2011

Tumblin' tumbleweeds

So last night I frosted the cupcakes with the Buttershots icing, and spun some sugar that will go on top of them. Well, some of them. I wound up not making enough balls of spun sugar to top all of them, but enough to get my point across, hopefully.

I referred mostly to this article to get me started, and this short YouTube is pretty helpful, since all the words in the world don't make much sense when it comes to spinning sugar, as I was about to find out.


Boiling 2 cups sugar, 1/2 cup light corn syrup and 1/2 cup water to 310 F. At least the ingredients aren't super-exotic.


Preparing the work station: lots of newspapers, two pans, handles out, sprayed with Pam. Although this session wasn't as messy as I thought it was going to be. I imagined a kitchen cocooned in sugar.


In reality, this is about as messy as it got. More on the newspaper below than actually got made into spun sugar, but I'll get to that in a sec. Greasing the handles with Pam really helped. All this just slid right off.


So here's one that doesn't look too bad, even though it has a few lumpy bits in it. But I'm trying to make them look like tumbleweeds, so I want them to look a little rustic, right? Yeah, that's the ticket...


Some more.


So here's what it looks like on top of a Kelly's Kopper Kamel Kupcake. Kinda pretty, no?

Spun sugar post-mortem: I wanted darker strands of sugar because I wanted a more tumbleweed-y light brown, so I went an extra 10 degrees (320F) when I cooked the sugar. Mistake. At that temp, it continues to cook, quickly, even when I plunged the bottom of the pan into a bath of ice water as indicated in the instructions. So this batch turned out pretty brittle and didn't want to cooperate when I was trying to spin it out over the pan handles. Most of it fell straight down to the floor or clumped on the handles. But I managed enough to top maybe 7 or 8 cupcakes.


Also, seeing a lot of sets of instructions out there that recommend using a wire whisk with the ends snipped with wire cutters to spin out the sugar. Like so:

I had bought a wire whisk at the dollar store the other night, just for this purpose, but, as is typical around this house, I could not find the requisite wire cutters that I know are around here somewhere. So I wound up using just a fork instead. Next time, though... Anyone got wire cutters I can borrow?

These cupcakes are for my dad's birthday dinner tonight. Hopefully he will get a kick out of the little "tumbleweeds," which have been the bane of his existence since moving out here to Nevada late last year.